Display Circuit - Step 1
The first step of building the display is to place the major components and connect them to power and ground as appropriate.
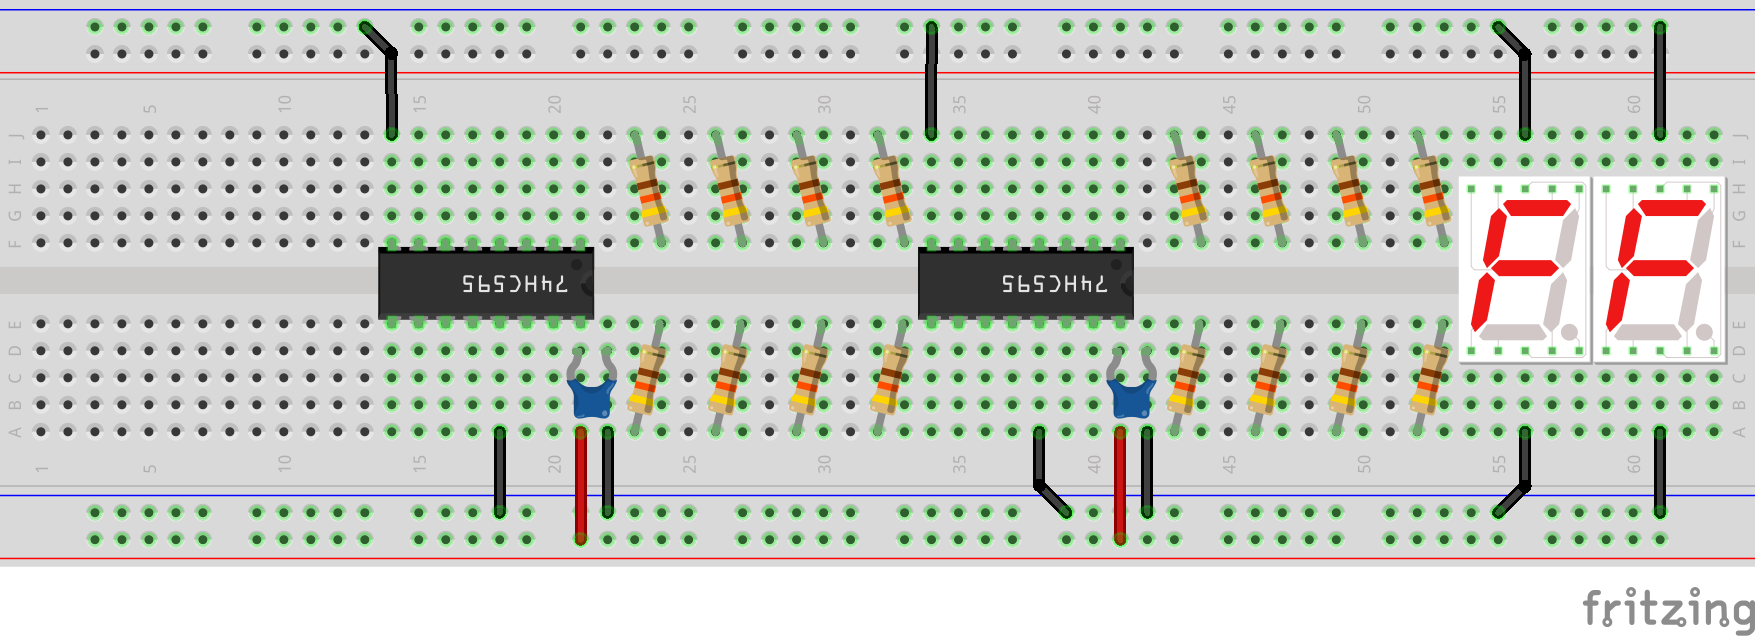
Disconnect the Arduino board from the computer and add the components and wires in the diagram below to your breadboard.
Important Notes
- To make the diagram easier to read, the components you have already placed (such as the temperature sensor) are not shown. Do not remove them from the breadboard, just leave them where they are.
- Place the components exactly where they are shown to ensure your project fits on the breadboard, start by placing the shift registers and 7-segment displays first.
- Pay attention to which way the shift register is facing. Note the notch is on the right side in the diagram.
- Just as with the temperature sensor circuit, the blue component near the shift register is a capacitor (and the ones you have are yellow). It should be placed as close to the shift register as possible.
- Use the small pieces of wire to connect the shift registers and displays to power and ground to prevent your circuit from getting too messy.
- Use the same colour of wires as those shown in the diagram to make it easier to fix problems with your circuit.
- The resistors in the diagram are placed diagonally. It is very important that the two ends of your resistor are in two different rows on the breadboard.
- The resistors should be 430Ω ±5% resistors. They have the band pattern yellow, orange, brown, gold.

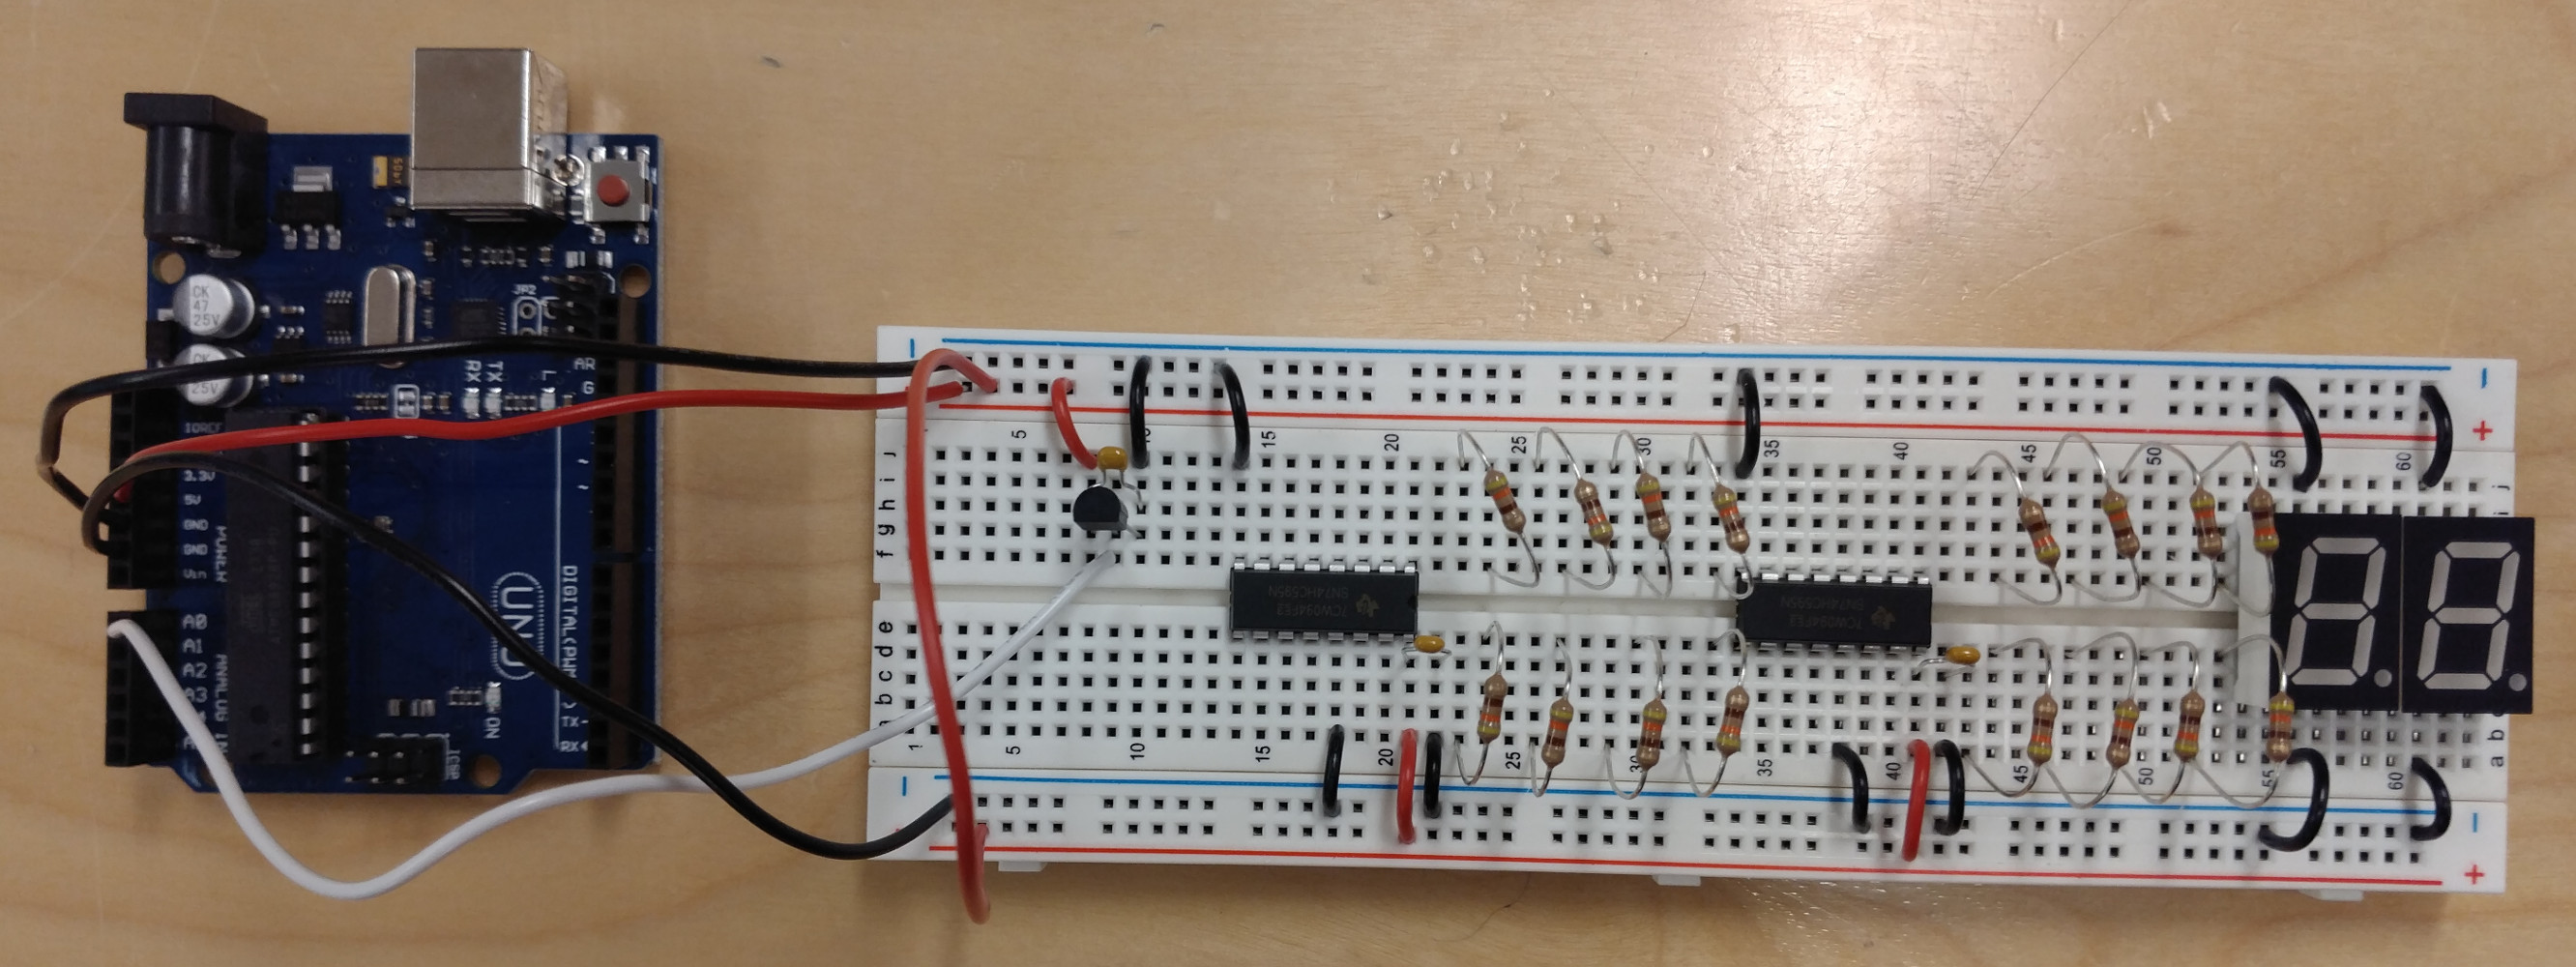
After adding the components in the diagram above, your project will look something like the picture below.

Check your Circuit
Before continuing, check your circuit to confirm it is wired correctly. Ask a mentor to double check the circuit after you have checked it.
This circuit has a lot of wiring and components that are placed close to each other. Ensure all the connections are correct and that there are no short circuits created by exposed conductors.